Chuyển đến nội dung chính

Paper Wrapped Pencils

WrappedPens wesens-art.blogspot.com
This time my 5 years old granddaughter shows you how to wrap pencils durable with beautiful wrapping paper! 
What she used: 
pencils 
gift wrapping paper 
scissors 
paint brush 
school glue 
water 
Dieses Mal zeigt meine 5-jährige Enkelin, wie man Stifte dauerhaft mit Geschenkpapier verschönert! 
Was sie nutzte: 
Buntstifte 
Geschenkpapier 
Pinsel 
Bastelleim 
Wasser 
WrappedPens 1 wesens-art.blogspot.com
 Cut the gift wrapping paper in strips. 
Das Geschenkpapier in Streifen schneiden. 
WrappedPens 2 wesens-art.blogspot.com
Mix glue and water (1:1). 
Kleiber und Wasser mischen (1:1). 
WrappedPens 3 wesens-art.blogspot.com
Coat the back side of the strips with the glue / water mixture.
Die Rückseite der Streifen mit dem Kleber- / Wasser-Gemisch besteichen.
WrappedPens 4 wesens-art.blogspot.com
Roll the pencils into the strips. 
Die Stifte in die Streifen rollen. 
WrappedPens 5 wesens-art.blogspot.com

WrappedPens 6 wesens-art.blogspot.com
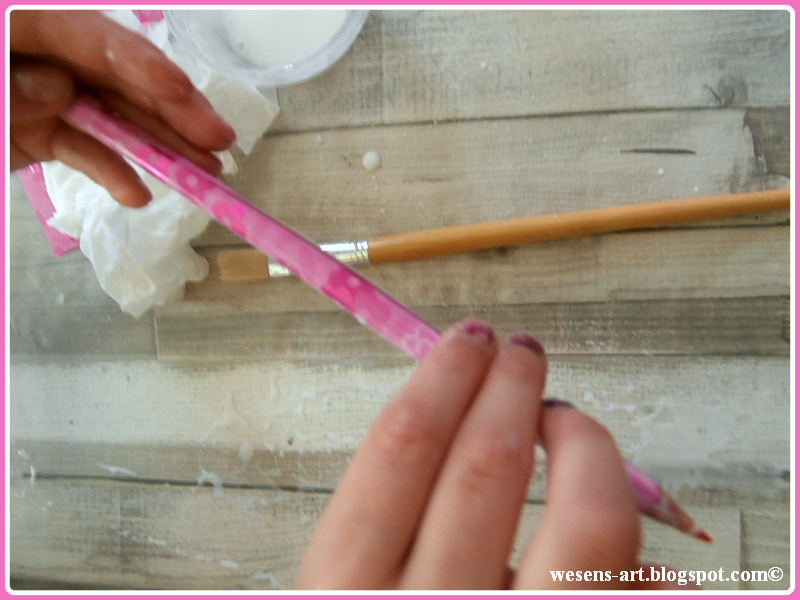
Now use your fingers to coat the pencils with the mixture and press the paper on. 
Nun mit den Fingern die Mixtur auftragen, um die Stifte zu beschichten. Das Papier anpressen.
WrappedPens 7 wesens-art.blogspot.com
Let the pencils dry. 
Die Stifte trocknen lassen. 
WrappedPens 8 wesens-art.blogspot.com
And it's done! 
Und fertig!
WrappedPens 9 wesens-art.blogspot.com

Visit and like me on Facebook!


Attention! It is not allowed to copy or use my posts, photos, pattern, templates or files for business or selling!!!
Wichtig! Es ist untersagt, meine Beiträge, Fotos, Schnittmuster, Vorlagen oder Dateien zu kopieren oder gewerblich oder zum Verkauf zu nutzen!!!
I’m sharing my projects with these fabulous linky parties: look here!
...

Nhận xét

Bài đăng phổ biến từ blog này

3D Paper Pumpkins - Free Patterns

I've been having a lot of fun “carving” my pumpkins this year! I've designed a round, tall, and wide version, complete with stem, twirling vine, and leaf. They're waiting to greet my little tricksters and I can't wait to give this threesome   in their treat bag to assemble themselves. I've mentioned one of the things that was topmost on  Craftsy 's agenda for me as an instructor, was to ensure my classes taught skills the students could then use in other projects. In Lesson 1, I show how to make a 3D Christmas Tree and wanted to show you how easy this technique is to apply in so many ways. Although my step-by-step instructions are not as interactive as watching the Craftsy lesson, you'll get a taste of it anyway. As with the tradition of Halloween trick-or-treating, I thought it would be a fun for you all to go to different houses to collect your treats and learn what else is in the land of paper ingenuity. House #1 - Round Pumpkin Jin Yong's house is  U...

Sports Bags / Sporttaschen

Here is a collection of 45+ free sewing patterns / tutorials for sports bags!  This collection contains sewing patterns / tutorials from different countries and in different languages.  With a click on the image you will go directly to the side of the creator!  (It could be that not all images will be shown in the mobile version of this post!)  Hier ist eine Sammlung von 45+ kostenlosen Schnittmustern / Anleitungen für Sporttaschen!  Diese Sammlung enthält Schnittmuster / Anleitungen aus verschiedenen Ländern und in verschiedenen Sprachen.  Mit einem Klick auf das jeweilige Bild gelangt man direkt auf die Seite des Erstellers! (Es kann sein, dass nicht alle Bilder in der Handyversion dieses Beitrags angezeigt werden!)  Safari Duffle Simple Duffle Bag Duffle Bag Simple Duffle Bag Duffle Bag Tote Duffle Bag Kids Size Duffle Bag Retro Duffle Bag Ruffle Duffle Bag Recycled Duffle Bag Mini Duffle Bag Beach Duffle Duffle Bag Duffle Totes Quilted Duffle ...

Quilled Poppy in Progress (5) and Custom Cut Paper

I've mentioned my love for paper from Daiso, a Japanese $2 dollar store. I've used it for many craft projects in the past. I wish they had more colors, because they offer a great range of shades in soft colors. Here are their "warm" and "cold" color packs. They don't list the thickness/weight but it's heavier than standard quilling strips because I find it holds the curve or shape I want over a greater distance, yet is flexible enough for me to make my tight coils without splitting, as thicker stock does. I use my Silhouette die cutter to cut lines in the paper, just shy of the ends so they stay in behaving sheets. Here are the 3 colors I've chosen to use in my poppy. I worried the dark one was too salmon, but it didn't look too bad when in place after all. I would make my general outlines with the darker strips first. Then I would start filling in with the medium pink. Finally I would add the lightest strips. I think the light strips were m...